
“The foundations of your Google account are essential for success. It’s also important to understand that these change over time. Almost 100% of the time during an account audit, foundational account and ad settings are where the most issues are identified.”
It’s important to note that there is not a one-size-fits-all approach. It’s more about understanding the needs of the business, the campaign needs, and how that translates into your account settings and structure. Below we will walk you through some of the settings you should watch out for in your Google Ads account to help set your campaigns up for success.
Starting off strong with account settings
Google has made it easier to set up an ad account based on goals. However, what they haven’t done as well, is made it easy to understand the inner workings of those settings. Unless you are deep into the weeds, it can be difficult to understand the impact they make on your campaigns, and some of these cannot be undone once set up.
Most of the time, upon start, the initial account settings are set up with the best of intentions. The challenge is here: most of the time once this is set up, it’s not always re-reviewed after the fact. Also, account settings can be altered later automatically by Google and those are then often overlooked by advertisers.
Pro tip: Check your account settings regularly! Your Google ad account settings can often make or break your campaign, so we’ll walk you through the options you need to watch out for.
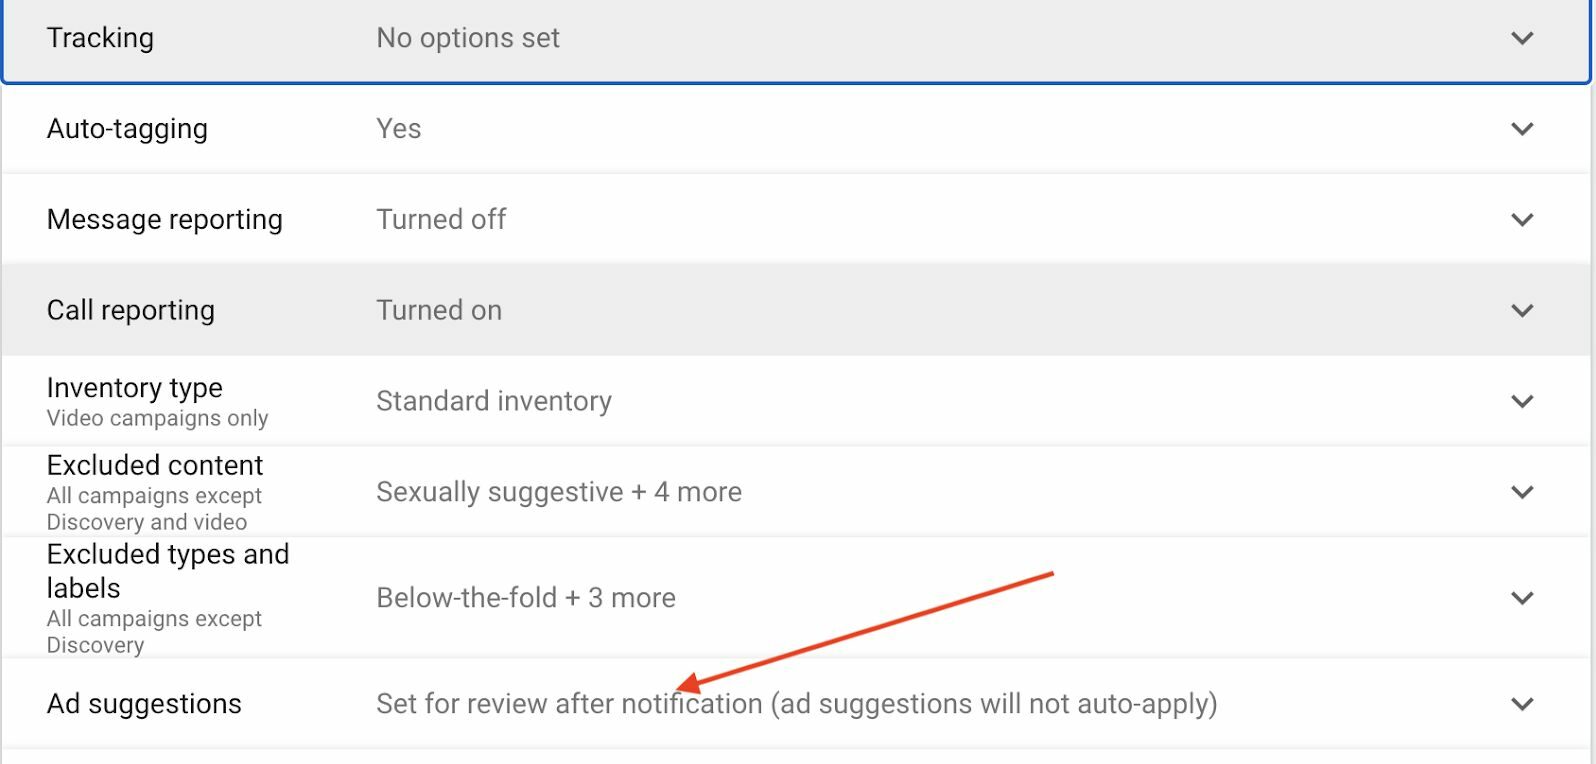
Ad suggestions
Let’s start with ad suggestions. Leaving this on auto-apply will allow Google to make changes to your ads. This setting may make sense to leave on auto-apply if you are not concerned about brand or messaging implications, or if you are a small business with very few resources, but for most brands, this should NOT be turned to auto-apply. And then just to be safe, you should revisit this setting often to make sure it hasn’t mysteriously been changed.
Inventory types
Although tracking, tagging and the other settings are important, the other area most often overlooked relates to the Google Display Network. And it starts with choosing the inventory type. If you don’t change anything here, it will automatically be set to standard. In general, Google does not give us much control over ad serving, which is controversial in my opinion as an advertiser. However, the little control we do have exists here.
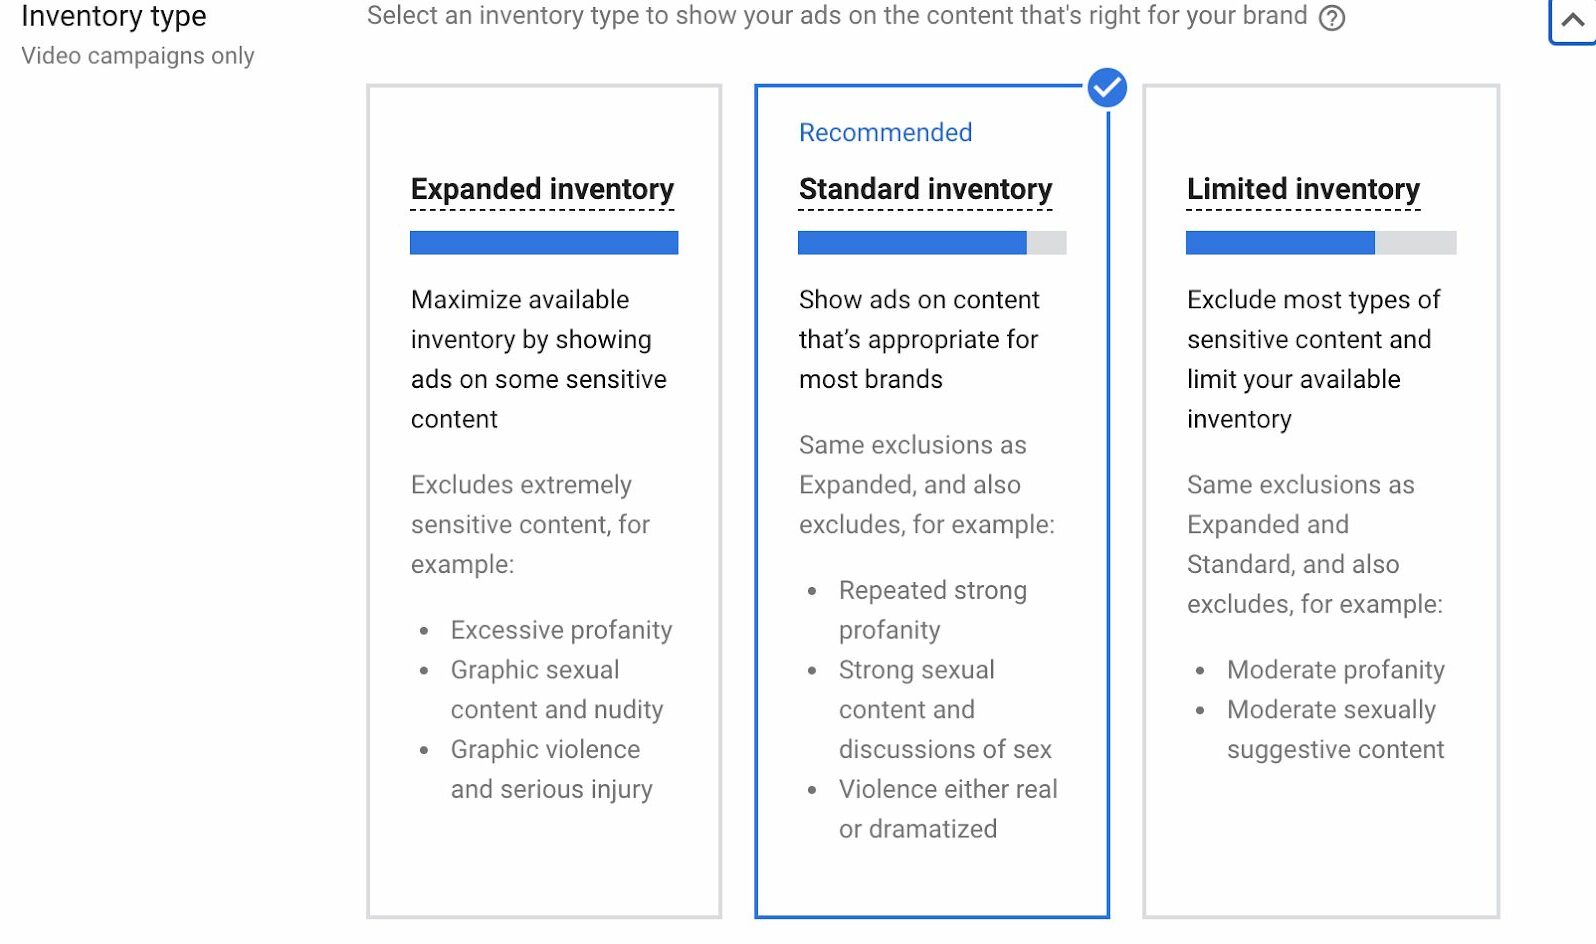
The type of inventory you choose should be based on the sensitivity of your brand, along with overall goals.
- If you are more brand sensitive, you should choose Limited Inventory.
- If you are not concerned about where your ads are served, from a brand standpoint, say you’re just going for the most impressions possible, Expanded Inventory could make sense, but use it with extreme caution.
- Standard Inventory is OK for most advertisers, however, proceed with caution and lots of monitoring of placements, and predefined exclusion lists.
Content-type exclusions
Let’s talk about other exclusions to add, starting with content, unless you are OK with showing your ads next to the latest horrible thing in the news or other questionable content. Make sure to exclude these at the campaign level as well.
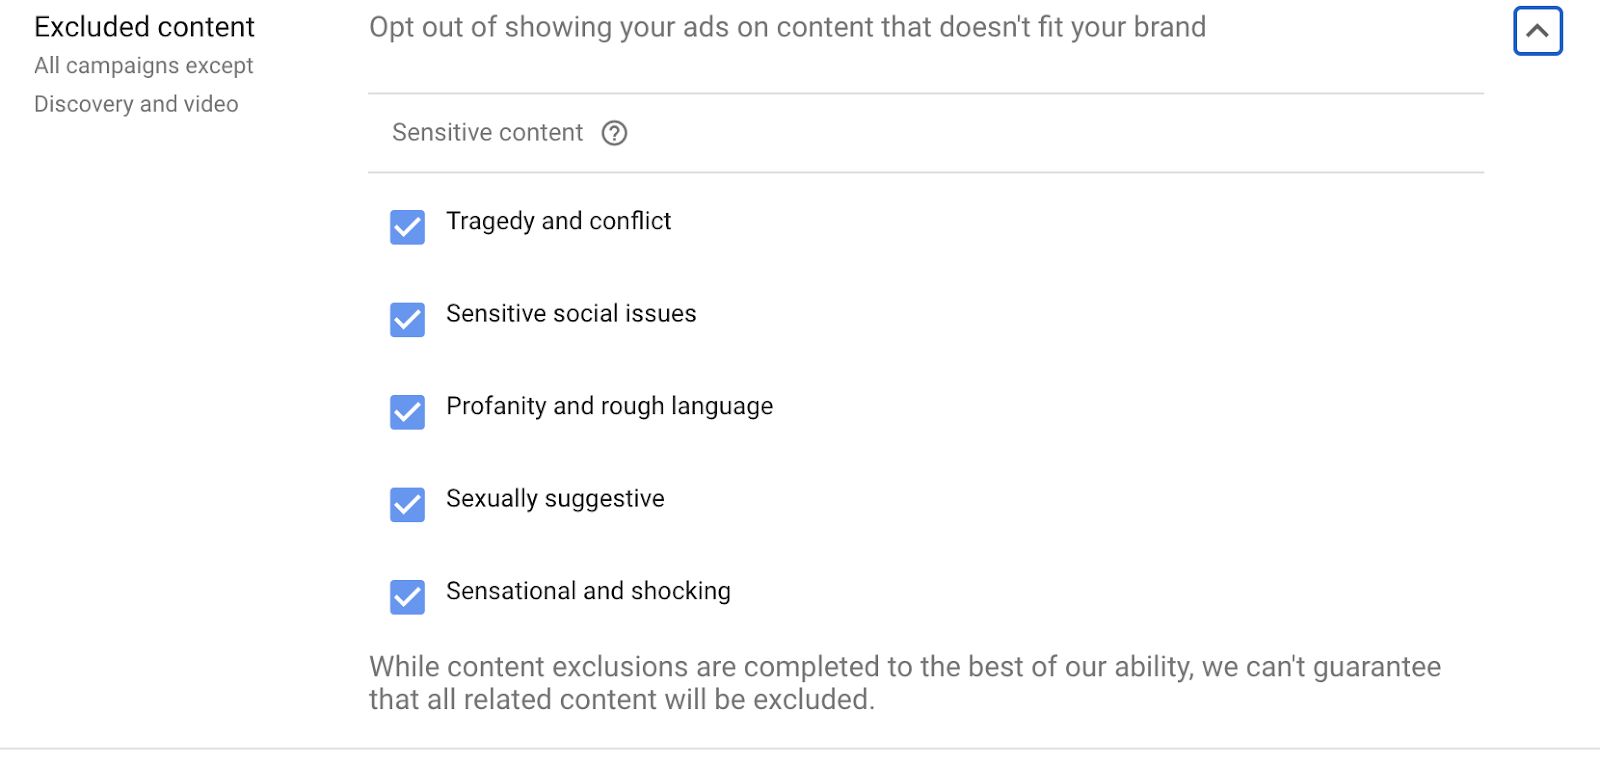
See the little note about no guarantees here. This is Google’s way of saying we’ll try not to run here, but hey, no promises.
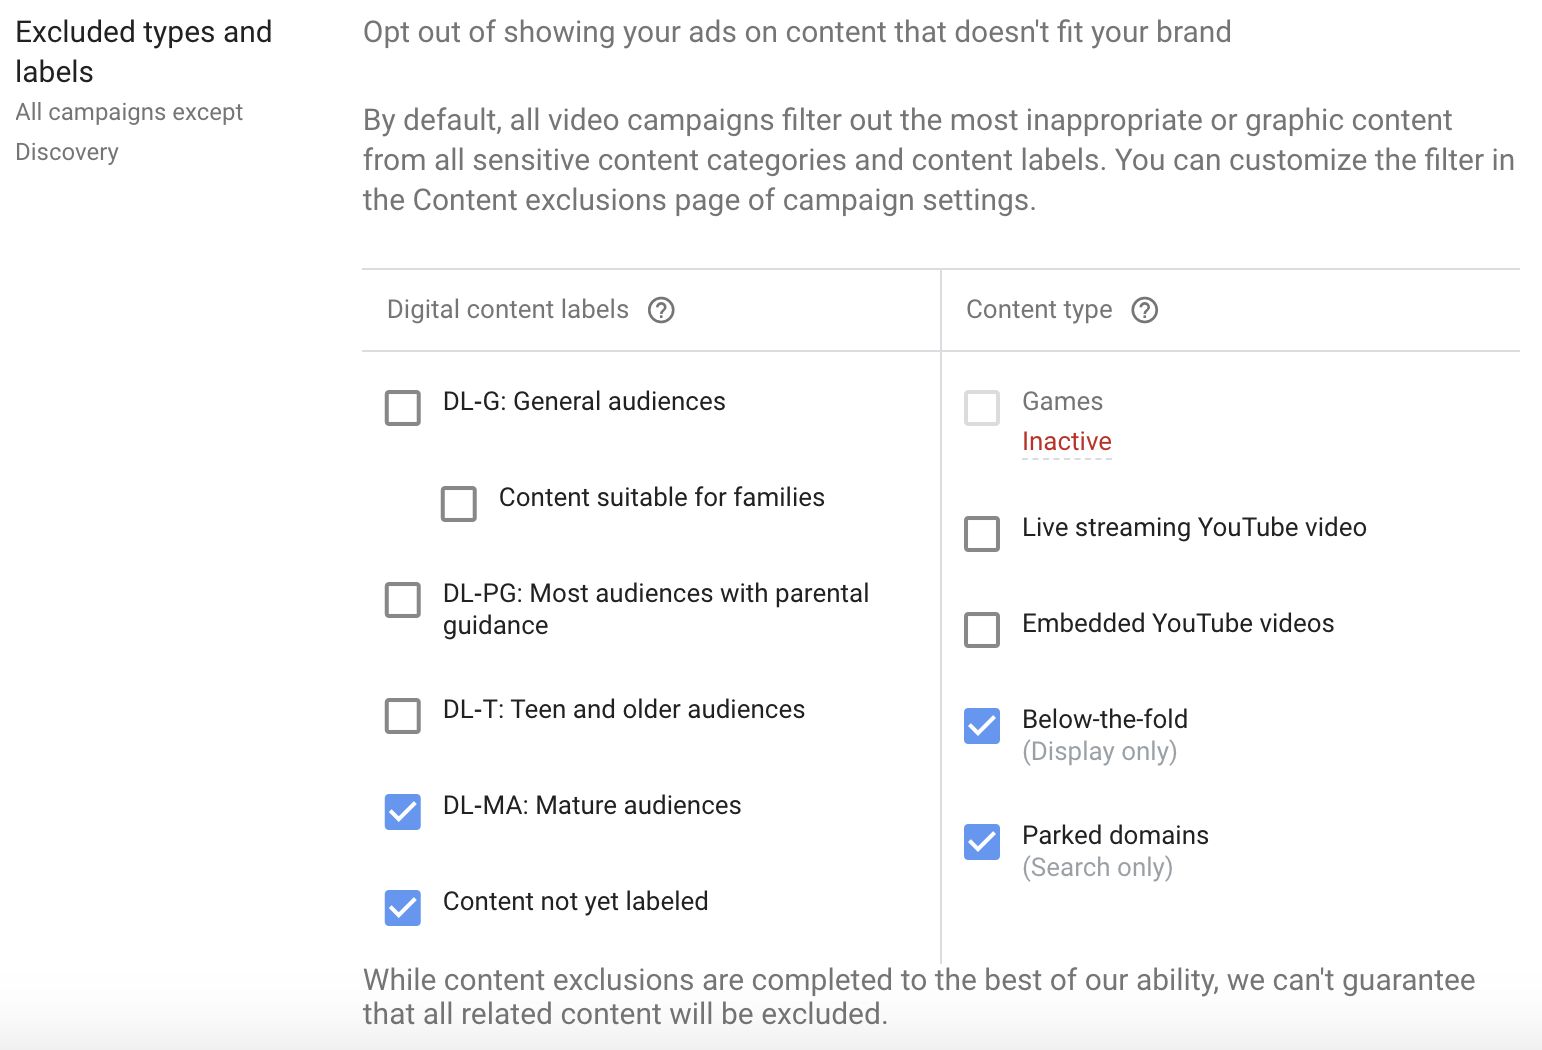
Moving on to types and labels. This is the part where I want to impart a back-in-my-day story, but I’ll restrain myself. In short, these used to be better than they are today. And here we can provide a little more context as to where we’d like to NOT have our ads shown. Again, the warning can be found here.
Negative placements
While we are on the topic of display quality, I’d like to briefly mention the importance of negative placement lists. Types of negative placements lists we typically use for display are Mobile Apps and Kids YouTube channels, among others, depending on the campaign and account. However, the exclusion lists have been more challenging with the app environment in Google.
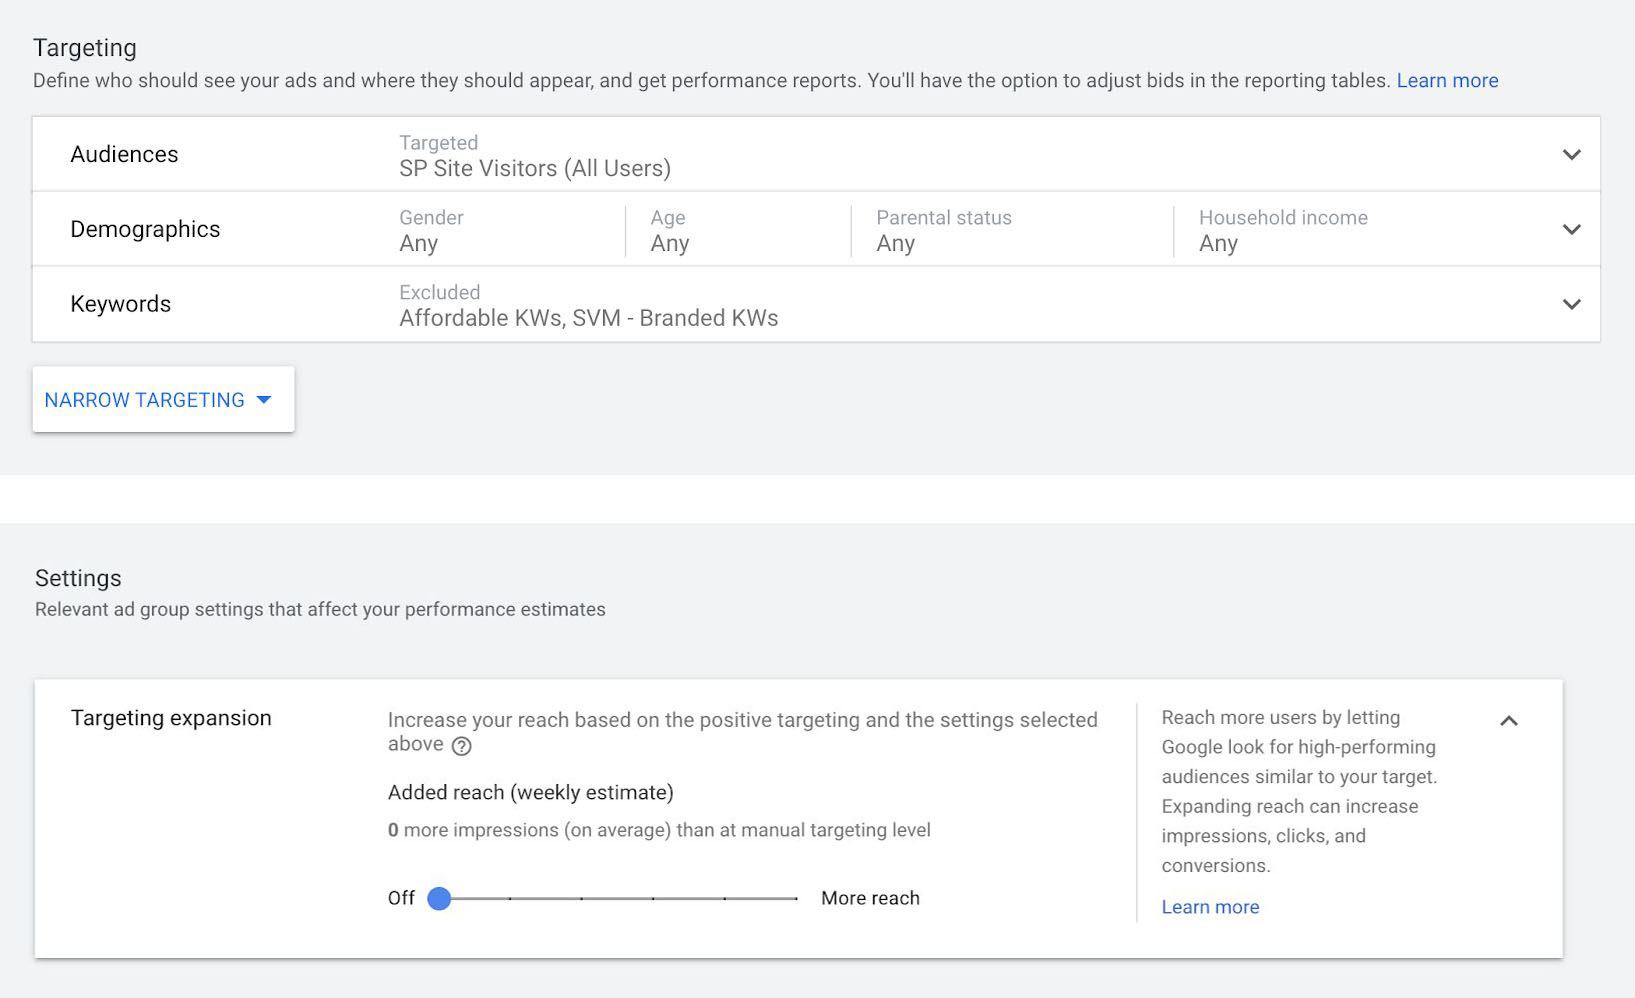
Ad group settings
Relatively newer to the display environments are ad group settings. Here you will want to make sure you understand the audiences that are being targeted and also turn off look targeting expansion if you are going for a remarketing-only list. See setting details in the screenshot below.
Location targeting
In location targeting, there are some key things to consider, including, where do you not want to target. In every campaign, just as important as the locations we want to target are the locations where we do not want to show up. Logically you may ask, well if I set up my campaign to target Michigan, why wouldn’t it just target Michigan? Simply. No. That’s just not how it works.
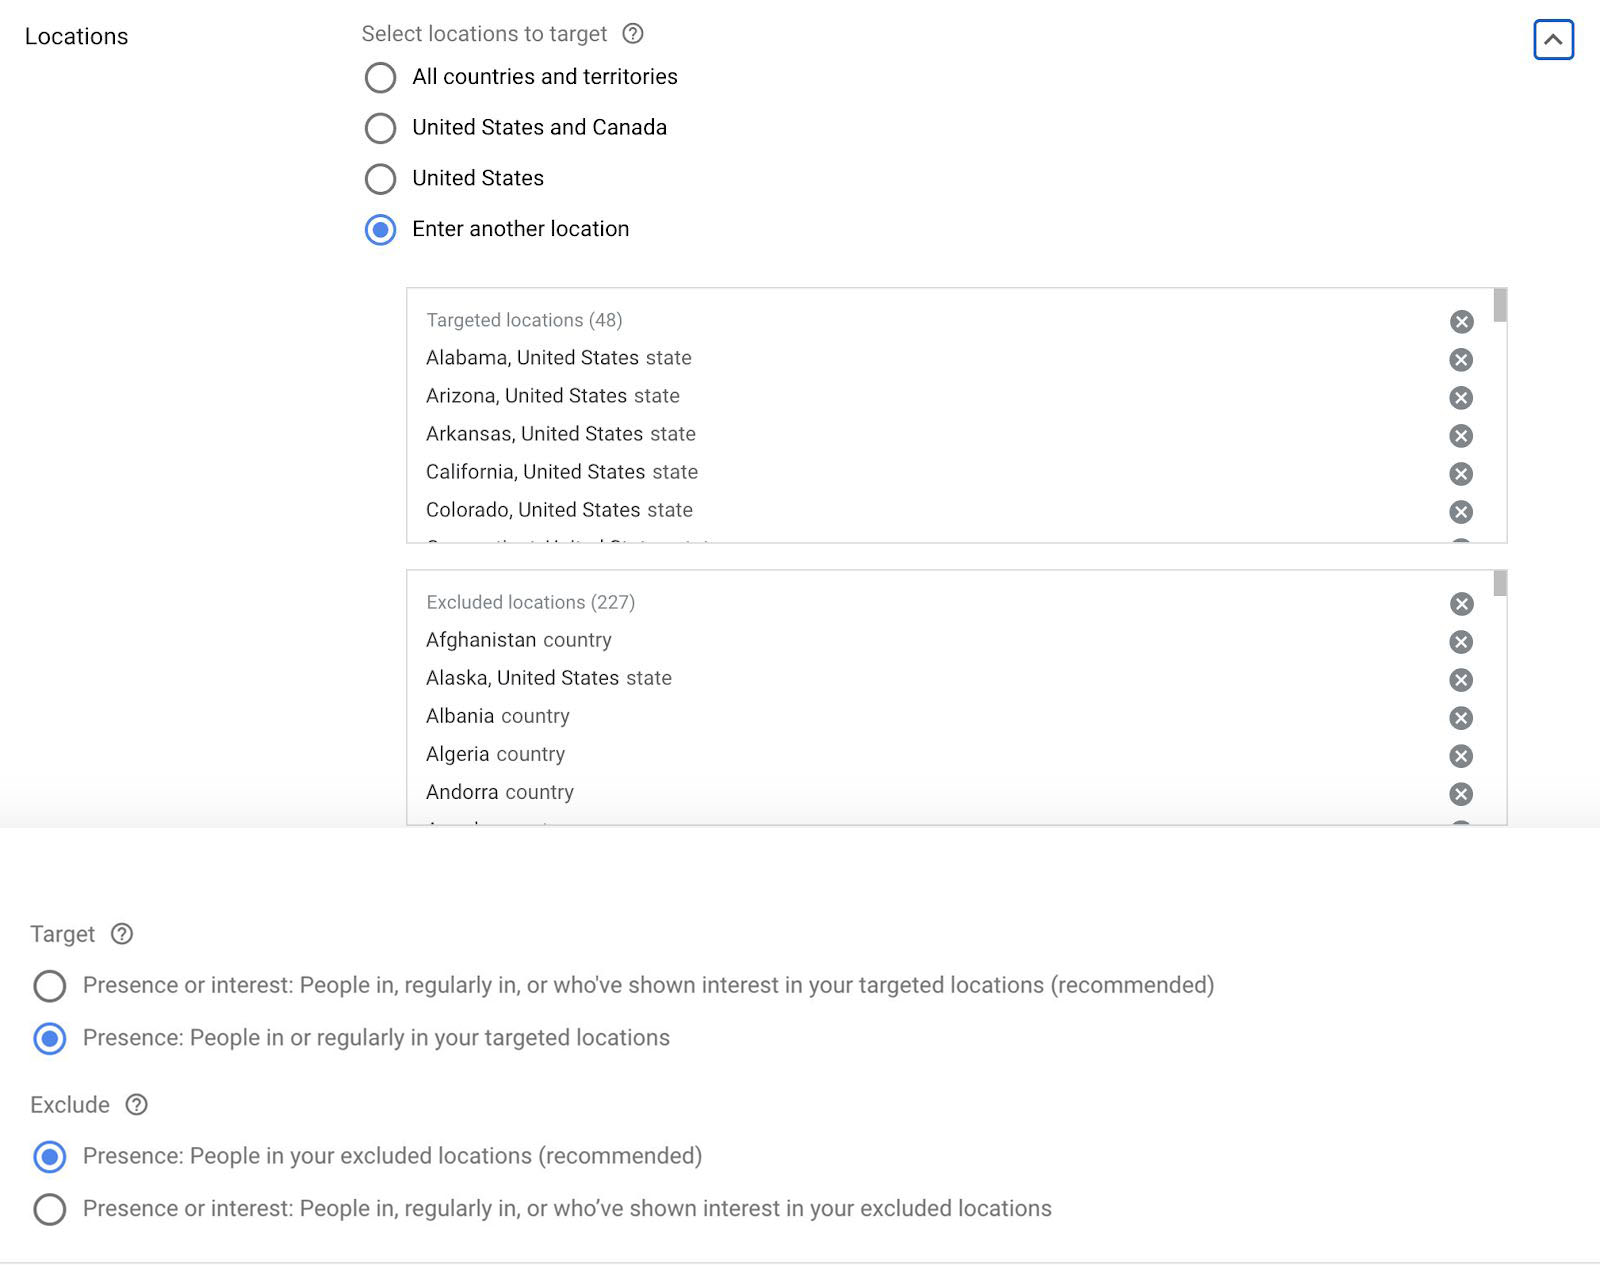
Under advanced settings, you also will find the people who are interested in Presence or Interest. Default settings will set to Presence or Interest. However, if you do not service outside of that location, or do not want to show outside of that location, you will want to select “Presence.” This does not guarantee, however, that you won’t show outside of that area, so still add your location exclusions here as well.
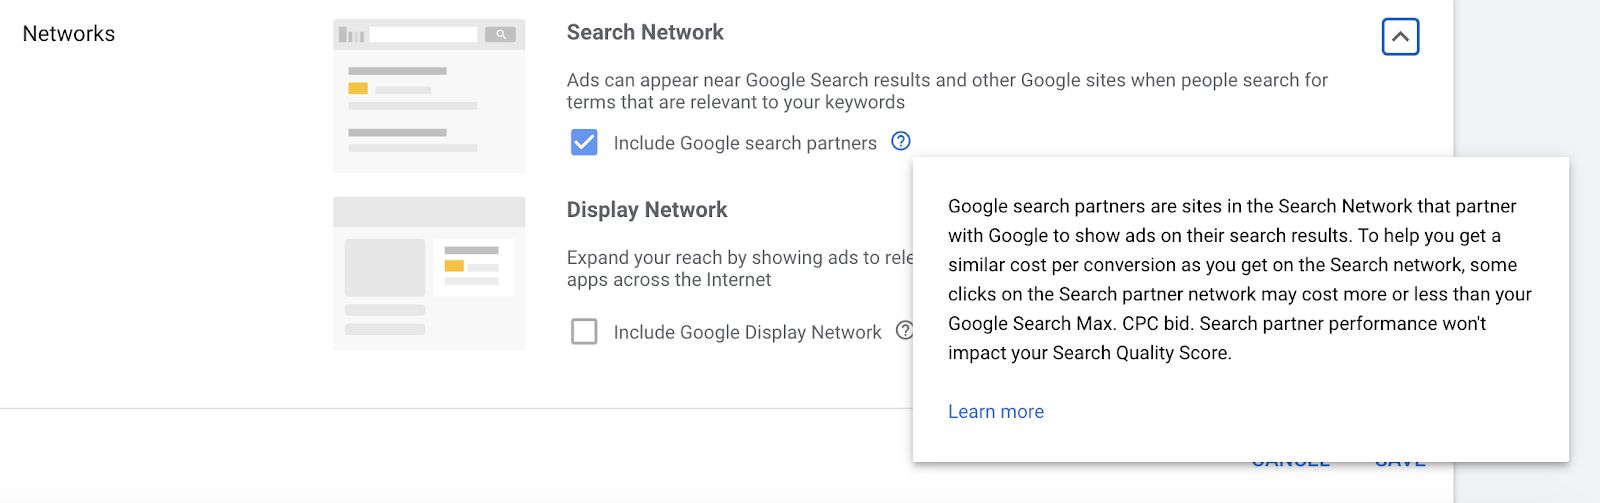
Search campaigns
Another thing to be aware of if you are running a search campaign are the network settings. If you are looking to just run on Google, you will want to make sure that Search Partners is not opted into, as well as Display Networks. Depending on the campaign and goals, Search Partners can be beneficial to expand out your campaigns. However, if you are just getting started, or are limited by budget, you will want to start with the Search Network only.